
Adobe® Volume Licensing
LWS Online Help
Version 1
July 31, 2009

Version 1 Page 2 of 38
Table of Contents
Log In ........................................................................................................................... 5
Log in with an Adobe ID .........................................................................................................5
Log in with Adobe ID – forgot password.............................................................................. 5
Log in using a multi-user legacy LWS Login ID .................................................................. 5
Multi-user legacy LWS Login ID and user not recognized ................................................................... 5
LWS Overview ............................................................................................................ 7
About LWS ................................................................................................................................ 7
LWS Home Page.......................................................................................................................................... 7
LWS Header................................................................................................................................................. 8
Utility Navigation........................................................................................................................................ 8
Navigation Menu......................................................................................................................................... 9
Quick Links .................................................................................................................................................. 9
Using the Magnifying Glass..................................................................................................................... 10
Select Multiple ........................................................................................................................................... 11
Export to CSV............................................................................................................................................ 12
Print............................................................................................................................................................. 13
About LWS Users ................................................................................................................... 13
Logging into LWS................................................................................................................... 13
Logging in for the First Time................................................................................................................... 13
Personal Settings....................................................................................................... 14
Enter, View, and Edit Personal Settings .............................................................................. 14
View Personal Settings for Another User ........................................................................... 14
Profiles...................................................................................................................................... 14
Select Your Profile..................................................................................................................................... 14
Change Your Profile ................................................................................................................................. 15
LWS Message Inbox................................................................................................. 17
View Messages ........................................................................................................................ 18
Forward Messages ..................................................................................................................................... 18
Print Messages ........................................................................................................................................... 18
Archive Messages.................................................................................................................... 18
View Message Inbox for Another User ............................................................................... 19
Reports....................................................................................................................... 20
Detailed Purchase History Report........................................................................................ 20
Run a Report ........................................................................................................................... 21
CLP Membership Details ...................................................................................................... 21
CLP Purchase Summary Report........................................................................................... 22
View Open Orders Report..................................................................................................... 23
View Return Orders Report .................................................................................................. 23
Licenses...................................................................................................................... 25

Version 1 Page 3 of 38
Retrieve Serial Numbers ........................................................................................................ 25
Transfer of License (TOL)..................................................................................................... 25
Identify License the Holders.................................................................................................................... 25
Add Deploy-to Information .................................................................................................................... 26
Validate and Submit ................................................................................................................................. 26
Track Media and Documentation........................................................................................ 26
Obtain License Certificates ................................................................................................... 27
Account Management ............................................................................................. 29
Account Types ........................................................................................................................ 29
End User ..................................................................................................................................................... 29
Deploy-to.................................................................................................................................................... 29
Media Ship-to ............................................................................................................................................ 29
Sold-to Partner .......................................................................................................................................... 29
Reseller........................................................................................................................................................ 29
Cost Center ................................................................................................................................................ 29
Internal Adobe........................................................................................................................................... 29
Edit Account Details................................................................................................................................. 30
Find Customer Accounts....................................................................................................... 30
Contact Management .............................................................................................. 31
Understanding Account Contacts........................................................................................ 31
Contact Types ......................................................................................................................... 31
Licensing Contact...................................................................................................................................... 31
Program Administrator............................................................................................................................ 31
Default Contact ......................................................................................................................................... 31
Primary Contact ........................................................................................................................................ 32
Managing Contacts ................................................................................................................ 32
Search for a Contact Person.................................................................................................. 32
Orders ........................................................................................................................ 34
Create a CLP Order ................................................................................................................ 34
Enter Purchase Order Details.................................................................................................................. 34
Enter Media Ship-to and Deploy-to Information ................................................................................ 35
Enter Line Item Details............................................................................................................................. 35
Confirm Your Order................................................................................................................................. 36
Create a TLP Order ................................................................................................................ 36
Enter Purchase Order Details.................................................................................................................. 37
Enter Media Ship-to and Deploy-to Information ................................................................................ 37
Enter Line Item Details............................................................................................................................. 38
Confirm Your Order................................................................................................................................. 38
Retrieve Saved Orders............................................................................................................ 39
View Order Status .................................................................................................................. 39
Request Return........................................................................................................................ 39
View Return Status................................................................................................................. 40
Download Software via Electronic Software Delivery (ESD)............................. 41
Manage Downloaded Software............................................................................................. 41

Version 1 Page 4 of 38
Granting ESD Entitlements................................................................................................... 41
View and Track ESD Entitlements....................................................................................... 42
Licensing Upgrade ................................................................................................... 43
Redeem an Upgrade Coupon................................................................................................ 43
View Existing Licensing Upgrade Entitlement Orders ..................................................... 43

Adobe Systems Incorporated LWS Online Help
Version 1 Page 5 of 43
Log In
For information about logging into LWS, see:
• Log in with an Adobe ID
• Log in with Adobe ID – forgot password
• Log in using a multi-user legacy LWS Login ID
Log in with an Adobe ID
With AVL onwards, accessing LWS can be done by using your own individual Adobe ID, your email address.
To log in with an email address:
1. Enter your Adobe ID and password.
2. Click Log In.
Note: If you have a login for the Partner Portal or Adobe.com, the Adobe ID is the same.
Log in with Adobe ID – forgot password
If you forget your password:
1. Click Forgot your password? below the password text box. You are directed to a new page.
2. Enter your email address that is associated with LWS.
3. Click Continue. You are directed to a new page.
4. Read the password hint if you provided one when you first accessed LWS and entered your personal
settings.
5. Click Return to Log In if the password hint helps you recall your password.
OR -
If the password hint does not help you or if you never provided a password hint, click Send Email to
receive an email with a link that will allow you to reset your password. (The link will expire in 24
hours. If you do not use it in that time, repeat the previous steps to reset your password.)
Follow the instructions in the email to reset your password.
Log in using a multi-user legacy LWS Login ID
Legacy login IDs were associated with Accounts not Contacts, which resulted in a shared login ID used by
multiple users. With AVL onwards, all contacts using LWS will be able to do so with their own individual
Adobe ID (your personal email address).
If you are accessing LWS using a login that was available to multiple users, there are a series of log in pages
that you may need to complete in order to create your own personal login. The process is easier to complete if
you know the old multi-user login and the password associated with it. If you have any problems, click on the
words “Contact Us” in the top right corner of every LWS page.
Multi-user legacy LWS Login ID and user not recognized
If you receive a message saying Adobe does not recognize you as a user, it means the login information you
provided does not correspond to the information in LWS.
You can do one of the following:

Adobe Systems Incorporated LWS Online Help
Version 1 Page 6 of 43
• Re-try logging into LWS.
• Contact Adobe by clicking on “Contact Us” in the top right corner of every LWS page.

Adobe Systems Incorporated LWS Online Help
Version 1 Page 7 of 43
LWS Overview
The main areas of LWS are:
• Personal Settings
• LWS Message Inbox
• Reports
• Licenses
• Account Management
• Contact Management
• Orders
• Download Software via Electronic Software Delivery (ESD)
• Licensing Upgrade
This overview provides information about:
• About LWS
• About LWS Users
• Logging into LWS
About LWS
LWS is a useful resource available to Adobe's volume licensing customers, channel partners, and internal
groups. A few of the features available in LWS are information about organizations and their relationships
with Adobe, reports for different users to manage their own or other users’ volume licensing accounts, and
access to ESD and upgrade fulfillment for customers.
LWS Home Page
When you log into LWS, the home page is the first page you see, except when Logging in for the First Time or
unless you are connected to multiple Profiles.
The home page contains Quick Links, the LWS Message Inbox, and information about pertinent volume
licensing topics and program offerings.

Adobe Systems Incorporated LWS Online Help
Version 1 Page 8 of 43
LWS Header
Every LWS page has a standard heading across the top of the page. This allows you to always see your name,
view your Profiles, use the Navigation Menu and the Utility Navigation, and Log Out.
Utility Navigation
The utility navigation is a part of the standard header that appears in the upper right corner of every page.
It contains links to important items within and out of LWS:
• Messages — links to the LWS Message Inbox

Adobe Systems Incorporated LWS Online Help
Version 1 Page 9 of 43
• Your settings — links to the Personal Settings page
• Help — links to the help feature
• Contact Us — links to a page with contacts relevant to your Profiles
• Log Out — logs you out of LWS
Navigation Menu
The navigation menu appears on every page of LWS. At any time while in LWS, you can move your cursor
over the words in the menu to select from a list of actions.
The navigation menu presents all actions that you can conduct while in LWS. Depending on your level of
access to LWS, the navigation menu you see may have different items from which to choose. If you are con-
nected to multiple Profiles, the items available in the navigation menu may change depending on the profile
you select.
There are five menu items from which channel partners, cost centers, and internal Adobe groups can choose:
• Home — directs you back to the LWS Home Page
• Accounts — provides access to your Personal Settings and the ability to conduct Account Manage-
ment and Contact Management
• Licenses — gives access to actions relating to licenses such as Obtain License Certificates and Retrieve
Serial Numbers.
• Orders — allows orders to be created, returned, and both to be tracked depending on your level of
access
• Reports — presents different reports such as the ESD Entitlement Report, the Detailed Purchase His-
tory Report, and CLP Membership Details to help you manage information.
Quick Links
On the left side of the LWS Home Page is a blue box called “Quick Links”. Quick links are links to common
tasks that you may find useful and let you quickly navigate in LWS after you log in.

Adobe Systems Incorporated LWS Online Help
Version 1 Page 10 of 43
If you are linked to multiple Profiles, the quick links listed on the LWS Home
Page will vary depending on the profile you choose on the Select Your Profile page after logging into LWS or
if you Change Your Profile.
Using the Magnifying Glass
Click on the magnifying glass next to certain fields to help you search for the necessary information for that
field. For example, next to a field for End User ID, you can click on the magnifying glass to search for the
desired End User.
To use the magnifying glass:
1. Click the Magnifying Glass next to the text box for which you want to find information. A search pop-
up page appears.
2. Enter the information you know in order for LWS to provide the most relevant information.
To search for a partial name, enter the first few letters and the asterisk * symbol as a wild card.
Note: The asterisk can be inserted into any portion of the name as a wild card.
3. Click Search. A search results pop-up page replaces the search pop-up page.
4. Click on the number or name that corresponds to the organization or person for which you are look-
ing. The item you selected appears in the original text box.

Adobe Systems Incorporated LWS Online Help
Version 1 Page 11 of 43
If you do not see the organization or person you are looking for, click Search Again at the bottom of
the search results pop-up page to return to the search pop-up page.
Select Multiple
Certain portions of LWS will allow you to list more than one of a particular search criteria by using Select
Multiple.
To use Select Multiple:
1. Click Select Multiple under or next to the text box for which you want to provide information. A Mul-
tiple Selection pop-up page appears.
2. Enter the multiple search criteria into the available text boxes.
3. Type in the relevant information into the spaces provided.
You can also copy the information from a Microsoft Excel file and enter it by clicking in the “Paste
Here” space at the bottom of the page and pasting the information. To see the information that was
just pasted, click on a text box and the information you entered will populate the text boxes.
Note: If you use the “Paste Here” space to enter the information, you must enter all of the items at once
or any attempt to paste more items will result in the original items being removed in place of the new
ones.
4. Click Done when you are finished. The first item you entered in the Multiple Selection pop-up page
will appear in the original text box near Select Multiple.
Note: For Select Multiple under or next to a Product Version drop-down list box, a Select Multiple
pop-up page appears with multiple drop-down list boxes for product names and versions, instead of
text boxes.

Adobe Systems Incorporated LWS Online Help
Version 1 Page 12 of 43
Export to CSV
Different sections of LWS allow you to search for information, which yields the search results in multi-col-
umn tables. To make use of this information outside of LWS, you can use Export to CSV above the search
results to export all of the results to a file (typically a Microsoft Excel file format).

Adobe Systems Incorporated LWS Online Help
Version 1 Page 13 of 43
Note: If the search results generated exceeds 5,000 lines, then only the first 5,000 lines are shown and are
available to export to CSV.
To use Export to CSV:
1. Click Export to CSV. A File Download pop-up page appears.
2. Click Open or Save.
Open will open the type of file listed on the page with all the search result information.
Save will cause a Save As dialog box to appear, which allows you to choose how you want the search
results to be saved.
Print
The print button appears at the top of certain pages and within your LWS Message Inbox. When you click
Print, either a print friendly version of the page appears with a print button or your computer’s printer dia-
logue box appears. Click Print on the print friendly page to trigger your computer’s printer dialogue box.
About LWS Users
LWS users are comprised of internal Adobe groups, channel partners (resellers and ALCs), and customers.
Each type of user has access only to the tasks that they are able to perform.
Logging into LWS
The log in process requires you to have an Adobe ID (usually your email address), which is your own unique
login, and a password. This allows each person individualized access to LWS.
When you log into LWS you will typically see the LWS Home Page, unless you are Logging in for the First
Time or are connected to multiple Profiles.
Logging in for the First Time
The first time you log in, the first page you will see is the Personal Settings page. You will have an opportunity
to add or change information about yourself, your job function, and your communication preferences.
Note: After the initial time you log in to LWS, if you ever need to change your Personal Settings information,
you can always access the Personal Settings page once inside LWS by clicking on “Your Settings” from the
Utility Navigation section in the upper left corner of the window header.
If you are logging in for the first time and are connected to multiple Profiles, you will be presented with a
page that lets you Select Your Profile after completing the Personal Settings page.

Adobe Systems Incorporated LWS Online Help
Version 1 Page 14 of 43
Personal Settings
All users of LWS are able to edit their personal settings:
• Enter, View, and Edit Personal Settings
• View Personal Settings for Another User
• Profiles
Enter, View, and Edit Personal Settings
When you first access LWS (see Logging in for the First Time), you have to enter your personal settings,
including contact information and communication preferences.
At any time you can view and edit your personal settings for LWS. On any page, select “Your Settings” from
the Utility Navigation or select Accounts > Change Your Settings from the Navigation Menu.
The different personal settings you provide and can edit are:
•Name
•Email
•Phone Number
• Password
• Job Function
• Licensing Communication Preferences
• Marketing Communication Preferences
•Local Language
• Name in Local Language
View Personal Settings for Another User
To view another user’s personal settings, select Accounts > Find Customer Contacts from the Navigation
Menu and complete the steps to Search for a Contact Person.
Once you find the contact you for whom you want to view the personal settings for, click View Settings to
view the personal settings page for that person.
The ability to change the information on a contact’s personal settings page is limited to specific groups in
Adobe.
Profiles
A profile designates what your role is within LWS and what types of actions you can perform.
If you are connected to multiple profiles, you will be presented with a page every time you log in to LWS that
allows you to Select Your Profile before you are allowed access to the LWS system. At any time while you are
working in the LWS system, you can Change Your Profile.
Select Your Profile
If you have access to more than one profile in LWS, there is an opportunity to select a profile after logging
into LWS.

Adobe Systems Incorporated LWS Online Help
Version 1 Page 15 of 43
After logging in, you are directed to a Select Your Profile page before going to the LWS Home Page. This page
appears every time, after log in for LWS users linked to multiple profiles.
The profiles consist of:
• End Customer
• Reseller
• Sold-to Partner
• Cost center
• various internal Adobe profiles
To select a profile:
1. Click on drop-down profile list box. The list of profiles associated with your login appears.
2. Select and click on a profile from the list. Your new choice will appear in the box.
3. Click Continue to complete your profile selection and to proceed to the LWS Home Page.
Note: Yo u c an Change Your Profile at any time while you are logged into LWS.
Change Your Profile
Depending on your type of access to LWS, you may have the ability to change your profile at any time while
working in LWS. The profile designates what types of actions you can perform within LWS.
To change your profile:
1. Look for the word “Profile” in the top right corner of every LWS page.
In order to change your profile, the space next to “Profile” must be a drop-down list box.
2. Click on the drop-down list box.

Adobe Systems Incorporated LWS Online Help
Version 1 Page 16 of 43
3. Select a different profile from the list.
Your new profile will appear in the box and you will be re-directed to the LWS Home Page if you are
not already there.
Note: The Quick Links, Navigation Menu, and LWS Message Inbox will be updated with options spe-
cific to your profile.

Adobe Systems Incorporated LWS Online Help
Version 1 Page 17 of 43
LWS Message Inbox
The LWS Message Inbox contains important messages from Adobe Volume Licensing that pertain to licens-
ing orders, CLP Membership Agreements, Upgrade Plan, LWS, Licensing Upgrade Entitlement, and other
volume licensing topics.
You can choose to have these messages sent only to your LWS Message Inbox, or you can select to have them
sent to your personal email address (the same email address you use as your login) and your LWS Message
Inbox. These settings are determined when you are Logging in for the First Time and choose your Personal
Settings. You may also change your LWS Message Inbox settings at any time by clicking “Your settings” from
the Utility Navigation options in the upper right corner of the LWS Header.
To navigate to the LWS Message Inbox, click “View All” from the Messages section of the LWS Home Page,
which displays your newest messages, or by clicking on “Messages” in the LWS Header.
While you View Messages in the LWS Message Inbox, you can Forward Messages, Print Messages, or Archive
Messages by selecting one of the corresponding buttons.
Adobe Systems Incorporated LWS Online Help
Version 1 Page 18 of 43
View Messages
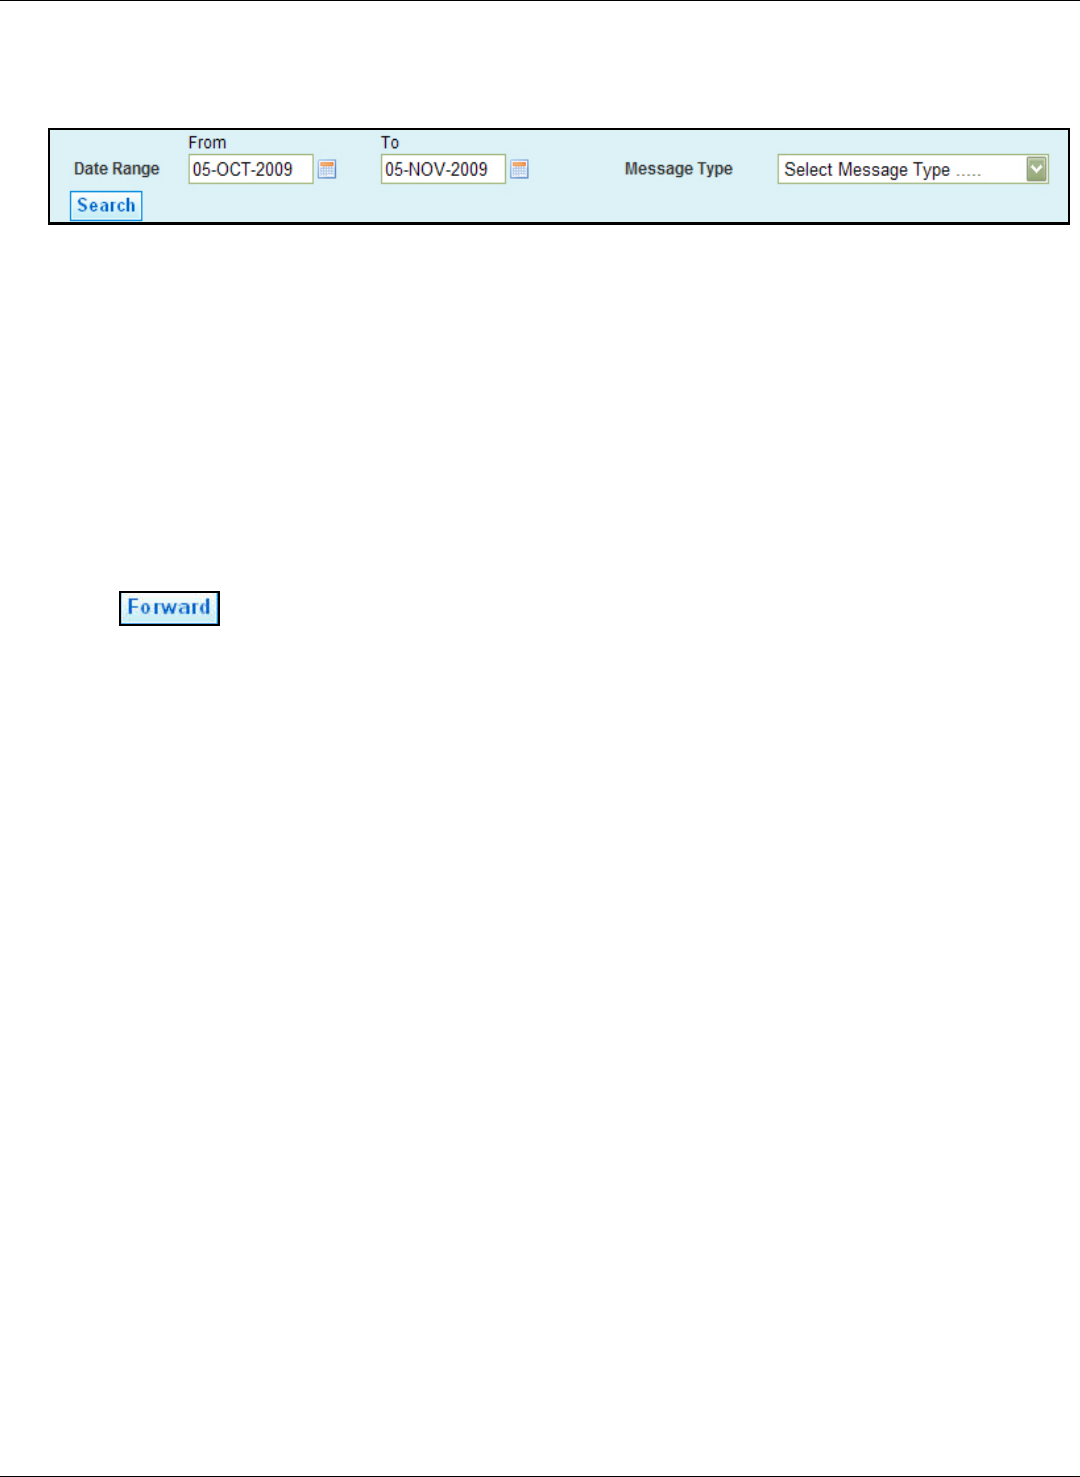
To find a particular message, narrow your search by filtering by date and/or message type.
From either the Messages section on the LWS Home Page or from the LWS Message Inbox, click on the mes-
sage’s subject title to see the message. You are taken to a Message page where the message displays. From there
you can read the message.
Forward Messages
You can forward message to up to 10 email addresses at a time. If a message requires saving past the 2 year
mark in which it is held in LWS, you may want to forward the message to yourself before it is deleted.
To forward a message:
1. Click Forward when viewing message.
You are taken to the Forward Message page.
2. Enter the email address(es) to whom you are forwarding the message.
You can provide up to 10 email addresses.
3. Add a personal message to the email recipients.
4. Click Send to complete the forwarding of the message.
Print Messages
To print a message:
1. Click Print when viewing the message. A pop-up page with a printable version of the message appears.
2. Click Print in the pop-up page. The message prints.
Archive Messages
Messages are automatically archived after the LWS Message Inbox reaches its compacity.
Once archived (manually or automatically by LWS), a message remains in the archive and cannot be moved
back to the Message Inbox. Messages will be deleted from the archive message box after two years.
To archive a message:
1. Check the box to the left of the message(s) to select the message(s).
2. Click Archive to archive the message(s).
OR
Click Archive when viewing message.

Adobe Systems Incorporated LWS Online Help
Version 1 Page 19 of 43
To view archived messages:
1. Click Archive on left side of Inbox page to view archived messages
2. Search for the message you want to find by filtering by date and/or message type
3. Click on the message to view.
View Message Inbox for Another User
All internal Adobe groups using LWS have the ability to access the LWS Message Inbox of other LWS users,
like end customers.
To view another user’s LWS Message Inbox:
1. Complete the steps to Search for a Contact Person to find the contact whose LWS Message Inbox you
want to view.
2. Click View Inbox to view the LWS Message Inbox for that person.
The contact’s name is identified in the instructions.
While viewing another user’s message inbox, you can View Messages, Print Messages, and Forward Messages
in the same manner as you would for the messages in your own LWS Message Inbox; however, no internal
Adobe group can archive a message for another user.
To find a particular message, use one or both message filters: message type and date.

Adobe Systems Incorporated LWS Online Help
Version 1 Page 20 of 43
Reports
LWS provides reporting on a variety of volume licensing transactions and membership details. The informa-
tion you can see depends on your Account Types.
You can select one or more End User IDs or Deploy-to IDs to see purchases for a specific entity or location.
The following reports are available for your use:
• Detailed Purchase History Report
• CLP Membership Details
• CLP Purchase Summary Report
• ESD Entitlement Report
• View Open Orders Report
• View Return Orders Report
Detailed Purchase History Report
The Detailed Purchase History report, formerly called the Comprehensive Order Details (COD) report, pro-
vides detailed order information for each order placed under a given End User ID.
The report contains information such as:
• Licensing Program Type
•Order Date
• Transaction Type (Upgrade, Return, Order)
• Sales Order Number
•Certificate ID
• End User ID, Name & PO Number
• Deploy-to ID, Name, Contact Name
• Membership information
• Discount Level
• Invoice information
• SKU information
•Product information
•Quantity
•Currency
•Price
To view this report, select Reports > View Purchase History from the Navigation Menu.
To run this report, see Run a Report.
After you run the report, you can click on a number in the Certificate ID column to see a PDF of the license
certificate.

Adobe Systems Incorporated LWS Online Help
Version 1 Page 21 of 43
Run a Report
Follow the instructions below to run one the following reports:
• Detailed Purchase History Report
• View Open Orders Report
• View Return Orders Report
Complete the following:
1. Select the report you would like to run from the Reports menu.
2. Enter the search criteria you have available. More information will help to yield more meaningful
search results.
You must provide at least one search criteria such as an Order Number (i.e. Adobe Order Number,
Sold-to Order Number). If no order number is provided, you must provide at least one customer ID. If
no customer ID is provided, must run the report by Deploy-to Country.
Note: Click Select Multiple to list multiple items at once. Some of the search criteria may allow you to
search by Using the Magnifying Glass.
3. Click Search. Your search results will appear in a table below the selection criteria, and you can click
on a column header to sort by that item.
Note: If you receive an error message about the number of results, you may want to narrow the invoice
date range to produce fewer results.
4. Click Export to CSV to save the information for offline viewing.
CLP Membership Details
Select Reports > View CLP Membership Details from the Navigation Menu to open the CLP Membership
Details Report.
The CLP Membership Details report includes:
• CLP Agreement Number
• Initial Discount Level
• Number of Achieved Points
• Membership Start and End Dates
• Adobe Account Manager
• Designated ALC
• Upgrade Plan Payment Option
• Upgrade Plan Order Schedule
• Legacy Grace Period End Date
To view an organization’s agreement details:
1. Enter either the End User ID or CLP Agreement Number.
To limit your search to a specific location such as City, State or Country:
a. Enter the Country.
b. Narrow by State, City, or Zip code if desired.

Adobe Systems Incorporated LWS Online Help
Version 1 Page 22 of 43
Note: You can also narrow your results to include information for a specific Contact Name or email
address.
2. Click Search. A table with organizations that match your search criteria will appears below the search
portion of the page, and you can click on a column header to sort by that item.
3. Click on a number in the Agreement Number column that corresponds to the organization for which
you are searching. The Accounts page with all of the CLP Membership Agreement details appears.
Or, click Export to CSV to save this information for offline viewing.
CLP Purchase Summary Report
The CLP Purchase Summary report is available to CLP Program Members and some internal Adobe groups.
The report contains the total quantity of individual products ordered from Adobe during a given time period
for one CLP Program Member.
It also contains basic CLP Membership information such as:
• End User ID, Name & Address
• CLP Agreement Number
• Membership Start & End Dates
• Current Discount Level
• Number of Achieved Points
• SKU information
•Product information
To view this report, select Reports > View CLP Purchase Summary Report from the Navigation Menu. To
view a CLP Purchase Summary report:
1. Enter all of the selection criteria you have available. More information will help to yield more mean-
ingful search results.
If you know an End User ID, CLP Agreement Number or Organization Name, you can enter it here.
Note: Click Select Multiple to list multiple items at once.

Adobe Systems Incorporated LWS Online Help
Version 1 Page 23 of 43
Note: Some of the search criteria may allow you to search by Using the Magnifying Glass.
2. Click Search to proceed. Your search results will appear in a table below the selection criteria, and you
can click on a column header to sort by that item.
3. Click on a number in the Agreement Number column that corresponds to your search. The Purchase
details page for that CLP Agreement Number appears.
4. Click Export to CSV to save the product and SKU information for offline viewing.
Or click Print to PDF to view the page’s information in a PDF.
View Open Orders Report
The Open Orders Report will show all orders for a specific End User or Channel Partner that have not pro-
cessed completely. Running this report may be helpful in determining the cause of an order that is delayed.
Specific groups in Adobe have the ability to view open order reports. If you are not a part of one of those
groups, the information regarding open orders will have no relevance.
The report contains information such as:
• Order Date & Number
• Transaction Type (Upgrade, Return, Order)
• Sold-to ID, Name, PO Number
• Reseller Name & PO Number
• End User ID, Name, PO Number, Contact, Email, Phone
• Deploy-to Name & Address
• Licensing Program
• SKU information
•Quantity
•Currency
To view this report, select Reports > View Open Orders from the Navigation Menu.
To run this report, see Run a Report.
View Return Orders Report
The Return Orders report displays all orders that were submitted to Adobe for return within a specified time
period for a specified End User and/or Channel Partner.
Specific groups in Adobe have the ability to view return order reports. If you are not a part of one of those
groups, the information regarding returned orders will have no relevance.

Adobe Systems Incorporated LWS Online Help
Version 1 Page 24 of 43
The report contains information such as:
• Return Order Date & Number
•Order Status
• Sold-to ID, Name, PO Number
• Reseller Name & PO Number
• End User ID, Name, PO Number, Contact, Email, Phone
• Deploy-to Name & Address
• Licensing Program
• CLP Agreement Number
• SKU information
•Quantity
•Currency
To view this report, select Reports > View Return Orders from the Navigation Menu.
To run this report, see Run a Report.

Adobe Systems Incorporated LWS Online Help
Version 1 Page 25 of 43
Licenses
License items available are:
• Retrieve Serial Numbers
• Transfer of License (TOL)
• Redeem an Upgrade Coupon
• Track Media and Documentation
• Obtain License Certificates
• Granting ESD Entitlements
Retrieve Serial Numbers
After an order is placed, you can retrieve the product’s corresponding serial number.
Note: If serial the number you attempt to retrieve is not listed, verify that the product was ordered.
To retrieve serial numbers, complete the following steps:
1. Select Licenses > Retrieve Serial Numbers from the Navigation Menu.
2. Enter the End User or Deploy-to ID in the available search space.
Note: Yo u c an s e ar c h by Using the Magnifying Glass near the available text box.
3. Click Search. The search results appear in a table below the search criteria.
4. Select a Product Name, Product Version, and Platform to filter the results listed, or click on a column
header to sort by that item.
5. Click Export to CSV to save the information for offline viewing.
Transfer of License (TOL)
Specific groups in Adobe have the ability to initiate a Transfer of License (TOL). For more information on
when Transfer of Licenses are allowed, please search on InField.
For TLP customers, all licenses in an order have to be transferred. A partial transfer is not allowed due to the
nature of the original transaction. For CLP members, some or all of the licenses they have can be transferred.
Identify License the Holders
1. Select Licenses > Transfer of License from the Navigation Menu to initiate a TOL.
2. Enter a Certificate ID or an Order number or search for an End User, Deploy-to ID or CLP Agreement
Number in the Select Certificate section of the Transfer of License pages.
Note: Yo u c an s e ar c h by Using the Magnifying Glass near the available text box.
3. Click Search. A page with the search results appears.
4. Click on the Certificate ID number that you want to transfer. The next Transfer of License page
appears.
If you don’t see the certificate ID you want to transfer, click Search Again, at the bottom of the page, to
perform the search over again.

Adobe Systems Incorporated LWS Online Help
Version 1 Page 26 of 43
5. Select the type of Licensing Program (i.e. TLP, CLP, commercial, education, etc.), within the New Cer-
tificate Information section, that corresponds to the licensing program type of the new license holder.
If the customer does not have a CLP, choose TLP.
6. Enter the End User ID or CLP Agreement Number for the organization that will receive the certificate,
or search by Using the Magnifying Glass.
Add Deploy-to Information
If the license you are transferring will be used in a location other than the address of the End User listed in
the New Certificate section, add Deploy-to Information.
Click Add/Edit to search for an existing Deploy-to ID for the new licensee. A list of existing Deploy-to Con-
tacts corresponding to the End User will be displayed.
If you find the correct Deploy-to Contact:
1. Select the Deploy-to ID.
2. Review the contact information and correct as necessary.
3. Click Create to add this Deploy-to Contact to the new certificate.
If you do not find an existing Deploy-to ID after searching:
1. Scroll to the bottom of the Deploy-to Results page and click Create New Deploy-to.
2. Enter the new Deploy-to information.
3. Click Create.
Validate and Submit
1. Validate the information in the Order Information section and determine the number of licenses to
transfer.
Note: For TLP customers, all licenses in an order have to be transferred. A partial transfer is not
allowed do to the nature of the original transaction.
2. Click Full Transfer or Partial Transfer.
3. Review the transfer of license information.
4. Click Submit to complete the transfer of license. A Transfer of License Acknowledgement page will
appear with the a confirmation that the license(s) were transferred.
Note: You may want to print a copy of the Transfer of License Acknowledgement page.
Track Media and Documentation
If you want to get shipping information about a shipment of software CDs/DVDs or documentation, you can
use the Track Media and Documentation function in LWS to obtain the tracking number for the shipping
carrier.
To track media and documentation:
1. Select Licenses > Track Media and Documentation from the Navigation Menu.
2. Enter the Order Number, Customer ID and/or Invoice Date Range of the order.
You can also enter the SKU number to filter your search. More search criteria will help to yield more
meaningful search results.

Adobe Systems Incorporated LWS Online Help
Version 1 Page 27 of 43
Note: Yo u c an s e ar c h by Using the Magnifying Glass, or click Select Multiple to choose multiple User
IDs for some of the search criteria fields.
3. Click Search. The search results appear in a table below the search criteria, and you can click on a col-
umn header to sort by that item.
4. Click on the tracking number to view tracking information provided by the carriers if the carrier was
listed on the order and is one the major carriers.
You can also click Export to CSV to view the list of media and documentation orders for offline view.
Note: If a limited amount of search criteria is entered, too much information may generate and only
the first 5,000 rows will display and be available to export to CSV.
Obtain License Certificates
Customers can obtain license certificates to keep for their records and to assist in their license compliance.
Note: If a Contact Person or End User ID has changed since the date of the order, these changes will be
reflected in the license certificate.
License certificates contain:
• Certificate Number
• Issue Date
• Order Number
• End User ID, Name & PO Number
• Licensing Program
• CLP Agreement Number (if applicable)
• Deploy-to ID, Name, Contact Name, Address
• Points (if applicable)
To obtain license certificates:
1. Select Licenses > Obtain License Certificates from the Navigation Menu to view the License Certifi-
cates page.
2. Enter your search criteria.
You may narrow your search by location, date range, and program and product information.
Note: Click Select Multiple to list multiple items at once.
Note: Some of the search criteria may allow you to search by Using the Magnifying Glass.
3. Click Search. The search results appear in a table below the search criteria, and you can click on a col-
umn header to sort by that item.
4. Click on the number in the Certificate # column to view the license certificate.
Or click on the Export to CSV to save the list of certificate IDs for offline viewing.
Note: If a limited amount of search criteria is entered, too much information may generate and only
the first 5,000 rows will display and be available to export to CSV.
If you received an error message about the search fields, make sure you entered at least one of the required
search fields:
• Order Number: Adobe Order Number, End User PO, Sold-to PO or Reseller PO

Adobe Systems Incorporated LWS Online Help
Version 1 Page 28 of 43
• ID: Sold-to ID, Reseller ID, End User ID or End User CLP Agreement Number
• Deploy-to Country
Note: If the intended certificate ID results are not generated, double check the search criteria you entered.

Adobe Systems Incorporated LWS Online Help
Version 1 Page 29 of 43
Account Management
There are different Account Types that use LWS.
You are able to perform the following tasks to manage your Account in LWS:
• Find Customer Accounts
Account Types
An account—also called an organization—within the Licensing Web Site refers to an entity of a specific user
type. Accounts are not individuals, but are more likely to be a business, school, government entity, or a spe-
cific department, or location. There are different types of Accounts or Organizations you may see depending
on your Profiles.
End User
A customer’s primary location or location they want associated with their CLP membership.
Deploy-to
The customer location where the licenses are being used.
New Deploy-to accounts are created when a new location is identified during one of the following events:
• An Adobe Sales Order is created.
• A license is transferred from an existing licensing customer.
• Adobe creates an account for an enterprise customers.
Channel Partners and Resellers are not allowed to be a Deploy-to contact person on an order. If the customer
would like the Channel partner to have access to their account, they can add the Channel Partner as a
Deploy-to contact.
Media Ship-to
The Customer, Adobe License Center (ALC), Distributor or Reseller location where physical items such as
software CDs, DVDs, or documentation are shipped. Customers who are listed as a Media Ship-to address on
an order will not have access to LWS.
Sold-to Partner
The physical location of the ALC, Solution Reseller or Distributor to whom Adobe sold the goods and/or ser-
vices.
Reseller
The Reseller is the entity that purchases software from a Sold-to Partner and sells it directly to a customer.
Cost Center
Internal Adobe Cost Center for placing donation and evaluation orders
Internal Adobe
Users who are Adobe employees or vendors in areas such as Sales & Sales Ops, Order Management, Cus-
tomer Care, Supply Chain Ops, Contract Coordinators, and IT.

Adobe Systems Incorporated LWS Online Help
Version 1 Page 30 of 43
Each Account Type has individual users or Contacts associated with it who are able to view, and in some
cases edit, information about that organization.
Edit Account Details
Specific groups within Adobe have the ability to do the same tasks as a customer or Channel Partner or Sold-
to, depending on their level of access. Internal Adobe users have the additional capability of searching for an
End User or Account.
Find Customer Accounts
To search for the account information for a particular organization:
1. Select Accounts > Find Customer Accounts from the Navigation Menu.
2. Enter in the search criteria to find an organization. At least the Customer ID or at least the first three
characters of the organization’s name are required.
3. Click Search. The search results appear in a table below the search criteria.
4. Click on the name in the Organization column that corresponds to the organization for which you are
searching. The Account Details portion of the organization’s Accounts page appears.
Or, if the organization is a CLP, click on a number in the CLP Membership column to see the CLP
Membership Agreement details of an organization.
See also Search for a Contact Person.

Adobe Systems Incorporated LWS Online Help
Version 1 Page 31 of 43
Contact Management
The parts of contact management are:
• Understanding Account Contacts
• Contact Types
• Managing Contacts
Understanding Account Contacts
Contacts are the individual users that are associated with an Account or Organization. Each Organization
may have multiple contacts. Also, an individual may be listed as a Contact on multiple Organizations within
LWS. Contact information includes:
•Name
• Email address
•Phone number
The individuals who are Contacts on an Organization have access to perform the following tasks:
• View details about the account, (depending on type of contact)
• Receive communications regarding orders, shipping, or program information, (depending on type of
contact)
• Edit or change the Organization and program information
• Add or remove Contacts from an Organization
• Set individual preferences on the Settings page
Contact Types
Licensing Contact
A Licensing Contact is any individual who is associated with an Account in the LWS. This contact person
may be listed on a particular order and would then receive communication regarding that order.
Program Administrator
Certain types of licensing programs such as CLP, and Term Site License--as well as Self-enrolled Affiliates of
a CLP Program Member require a Program Administrator. The Program Administrator is the main point of
contact for the licensing program and will receive communications about program details as well as have the
ability to change certain preferences about that specific licensing program.
Default Contact
Some organizations (i.e. Resellers and Deploy-to’s) accessing LWS have a Default Contact that receives com-
munications from Adobe if the original contact intended to receive the communication is no longer a part of
your organization. For example, if a contact person listed on an order has been removed from your organiza
-
tion, the Default Contact person will receive any subsequent communications regarding that order.

Adobe Systems Incorporated LWS Online Help
Version 1 Page 32 of 43
Primary Contact
Some organizations (i.e. Sold-to Partners and Cost Centers) accessing LWS have a Primary Contact that is
the only person that can add or remove contacts for the organization, and also receives all communication
from Adobe relating to their volume licensing account.
Managing Contacts
Specific groups within Adobe have the ability to manage the contacts for end user and/or channel organiza-
tions using LWS.
The following are the Contact Management related tasks available in LWS:
• Search for a Contact Person
Search for a Contact Person
Specific groups within Adobe have the ability to view information within LWS for channel partners, end cus-
tomers, and/or internal Adobe contacts.
Select Accounts > Find Customer Contacts from the Navigation Menu to search for a contact person.
Note: If you are linked to more than one profile (see Change Your Profile), make sure you are in the correct
profile to search for a contact person.
To search for a contact:
1. Enter the search criteria into the available fields.
2. Click Search. The search results appear on the page.
Note: By entering a contact’s name, their email address, or phone number, LWS will return results that
correspond with your search. If the search results do not match what you are looking for, double check
the information you entered and/or limit the information you enter to yield more results.
3. Select the radio button next to the name of the contact person for which you are searching.
4. Click on one of the buttons below the search results to proceed:
a. View Settings – view the personal settings for the selected contact person (See View Personal Set-
tings for Another User for more information.)
b. View Accounts – view the accounts to which the selected contact person is connected (See Find
Customer Accounts for more information.)
c. View Inbox – view the contact person’s message inbox (See View Message Inbox for Another User
for more information.)

Adobe Systems Incorporated LWS Online Help
Version 1 Page 33 of 43
d. Lock/Unlock – lock or unlock the selected contact person’s ability to access LWS
Note: Different internal Adobe groups will not see all of the buttons due to the level of access granted.

Adobe Systems Incorporated LWS Online Help
Version 1 Page 34 of 43
Orders
The following are Order related tasks available in LWS:
• Create a CLP Order
• Create a TLP Order
• Retrieve Saved Orders
• View Order Status
• Request Return
• View Return Status
• View and Track ESD Entitlements
Create a CLP Order
Specific groups in Adobe have the ability to create orders for channel partners.
Select Orders > Create Order from the Navigation Menu to begin the order process.
Enter Purchase Order Details
1. Enter the search criteria into the available fields and click Search.
The page reloads with the search results.
2. Click on a number in the Partner Agreement column.
3. Enter the CLP Agreement Number of the Program Member. Then click Search.
4. Click on the agreement number when the search results appear.
5. In the Bill-to field, select the Bill-to address where invoices are to be sent.
6. In the Payer field, select the Payer address if it is different from the Bill-to. The Payer is the entity
responsible for making the payment.
Note: The Payment Method field is populated automatically based on the channel partner’s credit
terms with Adobe.
7. Enter the Purchase Order Number for the ALC/Sold-to (required), Reseller (optional), and End User
(optional).
8. If there is a reseller on the order, enter the Reseller ID then click the magnifying glass to search for the
reseller information (see
Using the Magnifying Glass).
9. If you do not have the Reseller ID, click the magnifying glass to open the Search Reseller window.
Enter your search criteria, and then click Search.
Note: Use the asterisk (*) as a wild symbol.
10. Click on the Reseller ID number in the Reseller Search Results window to populate the reseller infor-
mation.
11. Verify the End User & Contact Information, and then click Continue.

Adobe Systems Incorporated LWS Online Help
Version 1 Page 35 of 43
Enter Media Ship-to and Deploy-to Information
The Media Ship-to information is used to indicate where physical product will be shipped, if it is included in
the order. The Media Ship-to information is required on all orders containing physical product.
The Deploy-to information is used to indicate where licenses are being deployed. The Deploy-to can be the
same as or different from the Media Ship-to. The Deploy-to information is required on all orders containing
non-shippable items.
For CLP orders, both the Media Ship-to and the Deploy-to information can be indicated at the header or line
item level.
To add or edit Media Ship-to information:
1. Click Add/Edit to enter the Media Ship-to information at the header level. This Media Ship-to infor-
mation will be used for all line items unless a different Media Ship-to is indicated for a specific line
item. Click Next.
2. Select a Media Ship-to address from the Select Recently Used Addresses drop-down menu. If the cor-
rect address does not appear in the menu, enter the new information in the fields provided.
Note: If you enter a PO number, mail stop, office number, etc. in the Address Line 1 field for the Media
Ship-to address, it will create a new Media Ship-to in the system. Enter this additional information
only if you wish to create a new Media Ship-to.
To add or edit Deploy-to information:
1. Click Add/Edit to enter the Deploy-to information at the header level. This Deploy-to information
will be used for all line items unless a different Deploy-to is indicated for a specific line item. Click
Next.
2. If the correct address is listed, select a Deploy-to address from the Deploy-to Results page.
To Create a new Deploy-to:
1. Click Create New Deploy-to at the bottom of the Deploy-to Results page.
2. Enter the new information in the fields provided.
Note: Do not enter a PO number, mail stop, office number, etc. in the Address Line 1 field for the
Deploy-to address. This will create a new Deploy-to in the system. If you need to enter this informa-
tion, enter it in the Address Line 2 or Address Line 3 fields. Data in these fields will not create a new
Deploy-to.
3. When you are finished, click Next.
If you have entered a new address that is not in the system, you will be prompted to edit or confirm the
information before continuing.
Using the new address will create a new Deploy-to that can be used on future orders.
Enter Line Item Details
1. Enter the SKU, Quantity, and End User PO Date for each item that you want to order.
2. Click Update to populate the Description, Price, Points, and default Media Ship-to and Deploy -to
information.
3. If you have a different End User PO for one or more line items, enter the PO in the End User PO field.
Otherwise, the End User PO entered on the Create Order page will be used.

Adobe Systems Incorporated LWS Online Help
Version 1 Page 36 of 43
4. If you want to change the Media Ship-to and/or Deploy-to information for a line item, click the icon in
the Ship/Deploy column. You will be prompted to select or enter a new Media Ship-to or Deploy-to
address.
5. If you specify a custom line item Media Ship-to or Deploy-to, the icon will change to indicate the cus-
tom information for that line item.
Note: If you are a worldwide ALC ordering product for multiple regions, refer to the How to Order
Guide for Adobe License Centers on the Adobe Partner Portal at http://partners.adobe.com for infor-
mation on how to select the appropriate currency and pricing.
6. Click Add More Items if you need more than 10 lines for your order.
7. Click Continue to go to the CLP Order Confirmation page.
Confirm Your Order
1. On the CLP Order Confirmation page, carefully review the End User, Media Ship-to, and Deploy-to
contact information.
2. Verify that all items and quantities ordered are correct and that any custom line item Media Ship-to
and/or Deploy-to addresses are indicated correctly.
3. Click Submit if you need to make changes.
Click Save if you want to save the order to process later.
Click Back if the order is correct and you are ready to proceed.
4. After your order processes, the CLP Order Acknowledgement page displays. Please note your order
number at the top of the page.
Click Print to print this page for future reference.
Create a TLP Order
Specific groups in Adobe have the ability to create orders for channel partners.
Select Orders> Create Order from the Navigation Menu to begin the order process.

Adobe Systems Incorporated LWS Online Help
Version 1 Page 37 of 43
Enter Purchase Order Details
1. Enter the search criteria into the available fields, and click Search.
The page reloads with the search results.
2. Click on a number in the Partner Agreement column.
3. In the Bill-to field, select the Bill-to address where invoices are to be sent.
4. In the Payer field, select the Payer address if it is different from the Bill-to. The Payer is the entity
responsible for making the payment.
Note: The Payment Method field is populated automatically based on the channel partner’s credit
terms with Adobe.
5. Enter the Purchase Order Number for the Distributor/Sold-to (required), Reseller (optional), and End
User (optional).
6. Enter the Reseller ID then click Add Contact to add a contact for this order.
7. If you do not have the Reseller ID, click the magnifying glass to open the Search Reseller window.
Enter your search criteria, and then click Search.
Note: Use the asterisk (*) as a wild symbol.
8. Click on the Reseller ID number in the Reseller Search Results window to populate the reseller infor-
mation.
9. Enter the End User ID then click the magnifying glass to search for the end user information (see
Using the Magnifying Glass).
10. If you do not have the End User ID, click the magnifying glass to open the Search End User window.
Enter your search criteria, and then click Search.
11. Click on the End User ID number in the End User Search Results window to populate the end user
information.
12. Verify the End User information, and then click Continue.
Enter Media Ship-to and Deploy-to Information
The Media Ship-to information is used to indicate where physical product will be shipped, if it is included in
the order. The Media Ship-to information is required on all orders containing physical product.
The Deploy-to information is used to indicate where licenses are being deployed. The Deploy-to can be the
same as or different from the Media Ship-to. The Deploy-to information is required on all orders containing
non-shippable items.
For TLP orders, the Media Ship-to and the Deploy-to information can be indicated only at the header level.
To add or edit Media Ship-to information:
1. Click Add/Edit to enter the Media Ship-to information at the header level. This Media Ship-to infor-
mation will be used for all shippable line items.
2. Select a Media Ship-to address from the Select Recently Used Addresses drop-down menu. If the cor-
rect address does not appear in the menu, enter the new information in the fields provided.

Adobe Systems Incorporated LWS Online Help
Version 1 Page 38 of 43
Note: If you enter a PO number, mail stop, office number, etc. in the Address Line 1 field for the Media
Ship-to address, it will create a new Media Ship-to in the system. Enter this additional information
only if you wish to create a new Media Ship-to.
3. Enter a contact name and email address for this order and click Create.
To add or edit Deploy-to information:
1. Click Add/Edit to enter the Deploy-to information at the header level. All existing Deploy-to accounts
for this End User will be displayed. This Deploy-to information will be used for all non-shippable line
items.
2. Select a Deploy-to address from the Deploy-to Results page.
3. If the correct address is not listed, you can either:
• Select a Deploy-to ID to edit an existing address.
• Click Create New Deploy-to at the bottom of the screen.
4. Enter the new information in the fields provided.
Note: Do not enter a PO number, mail stop, office number, etc. in the Address Line 1 field for the
Deploy-to address. This will create a new Deploy-to in the system. If you need to enter this informa-
tion, enter it in the Address Line 2 or Address Line 3 fields. Data in these fields will not create a new
Deploy-to.
5. When you are finished, click Create.
Enter or select the Deploy-to Contact Name and email address.
Note: If you have entered a new address that is not in the system, you will be prompted to edit or con-
firm the information before continuing. Using the new address will create a new Deploy-to that can be
used on future orders.
Enter Line Item Details
1. Enter the SKU and Quantity for each item that you want to order.
2. Click Update to populate the Description, Price, Points, and Start Date for any Upgrade Plan or sup-
port. You will also get a message if you need to specify a Media Ship-to and/or a Deploy-to address.
3. Click Add More Items if you need more than 10 lines for your order.
4. Click Next to go to the TLP Order Confirmation page.
Confirm Your Order
1. On the TLP Order Confirmation page, carefully review the Reseller, End User, Media Ship-to, and
Deploy-to contact information.
2. Verify that all items and quantities ordered are correct.
3. Click Submit if you need to make changes.
Click Save if you want to save the order to process later.
Click Back if the order is correct and you are ready to proceed.
4. After your order processes, the TLP Order Acknowledgement page displays. Please note your order
number at the top of the page.
Click Print to print this page for future reference.
Adobe Systems Incorporated LWS Online Help
Version 1 Page 39 of 43
Retrieve Saved Orders
Specific groups in Adobe have the ability to access saved orders for end customers and channel partners.
At any time, you can save an order to finish later. From any screen in the Create Order process, click Save to
save your order. Orders can be saved for a maximum of 60 days.
Select Orders > Retrieved Saved Orders from the Navigation Menu to go to the Saved Orders page.
To retrieve a saved order:
1. Enter the search criteria into the available fields, and click Search.
The page reloads with the search results.
2. Click on a number in the Sold-to column.
3. Click the Saved Order Number to open the order.
4. Follow the steps outlined in Create a CLP Order or Create a TLP Order to complete the order.
View Order Status
In order to view the status of an order, select Orders > View Order Status from the Navigation Menu.
Specific groups in Adobe have the ability to view the status of an order. If you are not a part of one of those
groups, the information regarding the status of orders will have no relevance.
To view an Order Status:
1. Enter the Adobe Order Number or any other search or filtering criteria.
2. Click Search. All orders matching your search criteria will display in the table below.
Note: If you receive an error message about the number of results, you may want to narrow the invoice
date range or provide more selection criteria to produce fewer results.
3. Click on the desired Order Number.
4. The View Order Status page displays the status of the order.
Request Return
Specific groups in Adobe have the ability to request returns for end customers and/or channel partners.
Select Orders > Request Return from the Navigation Menu to view the Return page.
To request a return:
1. Enter an order number or search by Sold-to PO or ID in the 1. Select an order portion of the Return
page. For CLP orders, you can also search by End User CLP Agreement number.
2. Click Search. A list of orders will appear in a table below the search criteria.
3. Click the Adobe Order Number of the order you wish to return.

Adobe Systems Incorporated LWS Online Help
Version 1 Page 40 of 43
4. Select a reason from the “Reason for Return” drop-down menu:
• Order Cancelled
• End User Did Not Accept EULA
• Wrong Product/Platform
• Wrong Company/End User
• Duplicate Order
• Wrong Language
5. For any return other than EULA returns or cancellations, enter the Replacement Order #.
6. [CLP Only] Select Full Return or Partial Return. If you are returning a partial order, enter the Return
Quantity. (Partial returns are not allowed for TLP orders.)
7. Click Continue.
8. Review the return details on the following page. If the return details are correct, click Submit.
9. After your return processes, the Acknowledgement page displays with your RMA number.
Note: To complete the return, the end user must sign and return the Letter of Destruction (LOD.)
Return credit will be issued only if the LOD is completed and returned within 30 days of the RMA
number being issued. Refer to the How to Order Guide on the Adobe Partner Portal at http://part-
ners.adobe.com for information on how to complete and return the LOD.
View Return Status
In order to view the status of a return, select Orders > View Return Status from the Navigation Menu to go
to the Return Status page.
Specific groups in Adobe have the ability to view the status of a return. If you are not a part of one of those
groups, the information regarding the status of returns will have no relevance.
To view the status of a return:
1. Enter the RMA Number or any other search or filtering criteria. Then click Search.
Note: An error message will appear if the search criteria provided does not match the information in
LWS. Verify the information you enter is correct.
2. If you receive multiple search results, select the one that you wish to view.
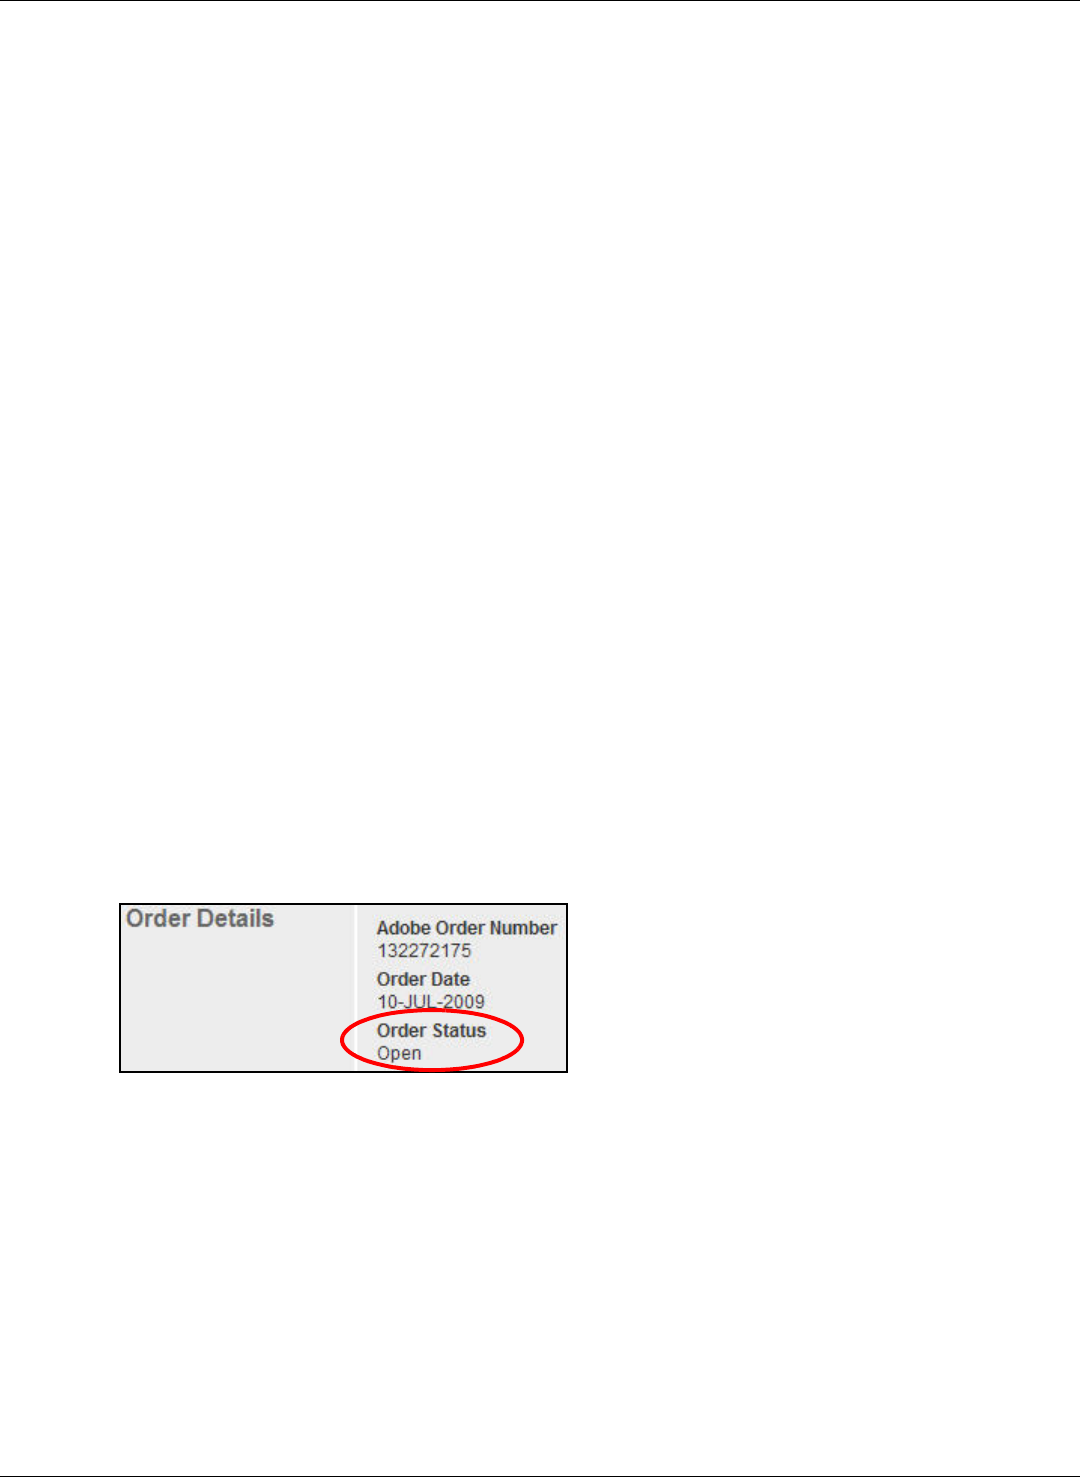
The View Return Status page provides the details of the return request and indicates the reason for any
open return.
• Open returns are on hold for various reasons, e.g. waiting for Order Management approval or the
Letter of Destruction (LOD).
• When the LOD has been received and processed, the status changes to Closed and a credit is
issued to your account.

Adobe Systems Incorporated LWS Online Help
Version 1 Page 41 of 43
Download Software via Electronic Software Delivery
(ESD)
The following are Electronic Software Delivery (ESD) related tasks available in LWS:
• Manage Downloaded Software / ESD Entitlement Report
• Granting ESD Entitlements
• View and Track ESD Entitlements
Manage Downloaded Software
Adobe provides you with the ability to manage downloaded software by using the ESD Entitlement Report,
which is similar to the “Download Log” available prior to AVL 5.
While viewing ESD entitlements, you can:
• View the products available to download
• View the download statistics:
• Contacts downloading software
• Download Date, Time, & Size
• IP Address of the computer where the software downloaded
Select Reports > View ESD Entitlements from the Navigation Menu to navigate to the ESD Entitlement
Report on the View ESD Entitlements page.
To view ESD entitlements for the download details of products:
1. Enter the selection criteria: End User/Deploy-to ID, product name and version, or date range.
Note: If you need assistance entering the search criteria, you can get help by Using the Magnifying
Glass. If you want to list more than one item for a particular search criteria, use Select Multiple.
2. Click Search. The table below the search section of the page updates to reflect your selection criteria.
To view all products’ download information: Click Show All Download Details to view the ESD Entitlement
Download Log pop-up page with the download details for all of the products.
To view a product’s download information: Click on a number in the Number of Downloads column to
view the ESD Entitlement Download Log pop-up page for a particular product’s download details.
Granting ESD Entitlements
Specific groups in Adobe have the ability to grant ESD entitlement and reasons for granting ESD to end cus-
tomers.
There are two main parts of granting ESD entitlements. The first part of the process centers around searching
for or creating a Deploy-to to whom you are granting ESD. The second part is selecting the types of products.
To begin the process, select Licenses > Granting ESD Entitlements from the
Navigation Menu.
Search for a Deploy-to:
1. Enter the Deploy-to ID, or click on the magnifying glass to search for an organization and proceed to
step a.

Adobe Systems Incorporated LWS Online Help
Version 1 Page 42 of 43
a. Enter in the search criteria into the available fields, and click Search. The Search Deploy-to Results
pop-up page appears.
b. Proceed to step 3.
2. Click Continue. The Search Deploy-to Results pop-up page appears.
3. Click on a number in the Deploy-to ID column that corresponds to the organization for which you are
searching. You can also create a new Deploy-to by clicking Create New Deploy-to.
The Create/Edit Deploy-to pop-up page appears.
4. Enter or edit the organization and contact information.
5. Click Continue when finished. The pop-up page closes and the first Granting ESD Entitlements page
re-appears.
6. Click Continue to proceed to the ESD products portion of granting ESD entitlements.
Select ESD products:
1. Select a product, version, platform, and language from the drop-down lists.
The available products will appear in the Available Products box.
2. Select a product in the Available Products box, your selection will be highlighted. This is the product
that you want to grant the Deploy-to ESD entitlement rights.
3. Click > to move the product into the Selected Products box.
Repeat steps 1-3 if there are more products for which the Deploy-to requires ESD entitlement rights.
4. Click Continue. A review page appears.
Note: You may receive an error message if a selected product is not available with ESD. Remove the
product from the Selected Products box and repeat step 4
5. Verify the End User, Deploy-to, and Product information is correct, and click Submit.
The Deploy-to now has ESD for the product(s) chosen.
View and Track ESD Entitlements
Select Orders > View ESD Status from the Navigation Menu to navigate to the Track ESD Entitlements page.
To track ESD entitlements for customers:
1. Enter the selection criteria (Deploy-to ID, Product Name, Product Version, and/or Date Range) to
track ESD entitlements on the Track ESD Entitlement page.
2. Click Search. A table with the information that matches the search criteria displays below the search
section of the page.
3. Click on a Deploy-to ID to view the ESD entitlement for a particular customer. The Granting ESD
Entitlements page appears with the End User and Deploy-to information and the ESD products that
are associated with that Deploy-to.
4. Review the ESD entitlement for the selected Deploy-to ID.
You can print the page for your records.

Adobe Systems Incorporated LWS Online Help
Version 1 Page 43 of 43
Licensing Upgrade
The following are Licensing Upgrade related tasks available on LWS:
• Redeem an Upgrade Coupon
• View Existing Licensing Upgrade Entitlement Orders
Redeem an Upgrade Coupon
Specific groups within Adobe have the ability to redeem an upgrade coupon on behalf of a customer.
To redeem an upgrade coupon:
1. Select Licenses > Redeem Upgrade Coupon from the Navigation Menu.
2. Enter a coupon number and proceed to step 3, or click on the magnifying glass and proceed to step a.
a. Enter in the search criteria into the available fields.
b. Click Search. The search results appear at the bottom of the page.
c. Click on a number in the Customer ID column that corresponds to the organization for which you
are searching. The Select a coupon or order portion of the Redeem Upgrade Coupon page appears
with a table of the customer’s unredeemed coupons and licensing upgrade orders (see View Exist-
ing Licensing Upgrade Entitlement Orders).
Note: To find redeemable coupons only, change the drop-down menu from “Show All” to “Show
Redeemable Coupons”.
d. Click on a number in the Coupon Number column to redeem the coupon for the customer.
e. Proceed to step 4.
3. Click Continue.
4. Review the upgrade order and modify the Deploy-to or Media Ship-to information if needed.
5. Click Submit at the bottom of the page when done to view the Order Confirmation.
View Existing Licensing Upgrade Entitlement Orders
Select Licenses > Redeem Upgrade Coupon from the Navigation Menu.
To view an upgrade order:
1. Click on the magnifying glass. The Select a Customer portion of the Redeem Upgrade Coupon page
appears.
2. Enter in the search criteria into the available fields.
3. Click Search. The search results appear at the bottom of the page.
d. Click on a number in the Customer ID column that corresponds to the organization for which you
are searching. The Select a Coupon or Order portion of the Redeem Upgrade Coupon page appears
with a table of the customer’s unredeemed coupons and licensing upgrade orders.
Note: To find redeemable coupons only, change the drop-down menu from “Show All” to “Show
Upgrade Orders”.
5. Click on a number in the Order Number column to view the order the order’s details.
