
Leica Zeno Connect Setup Guide
Upon initial connection to the FLX100 plus,
you will see the status fields populate with
position information.
If the antenna does not connect after a few
seconds, tap on Antenna
After connecting to the FLX100 plus we
need to configure our device for accuracy.
On the main screen tap on Settings.
Select the FLX100 plus device you have
connected via Bluetooth.
After selecting the FLX100 plus the
software will go back to main screen.
NOTE: The list will populate over time with every Leica Zeno
smart antenna you have connected. If you only have
connected to one, then only one will be listed.
Configure Realtime Corrections

Leica Zeno Connect Setup Guide
Tap on Realtime Corrections. Enter a name for the profile. A description is
optional. Tap the enter or checkmark button
to enter. Close keyboard to tap on Next
button that will be at bottom of the screen.
Tap on the to create a new correction
profile.
Connect to FLX100 plus Antenna

Leica Zeno Connect Setup Guide
Tap on Internet, then tap Next > at the
bottom of the screen.
Enter a name for the data server, then the
address, port and user credentials. In most
cases, make sure Use NTRIP with server
should be turned on. Tap on OK, then tap
Next >.
Tap on the to create a new Server.
Connect to FLX100 plus Antenna

Leica Zeno Connect Setup Guide
Tap on the icon to select a mountpoint.
Select the mountpoint of choice. Then tap
Next > at bottom of screen.
The app will now try to connect using the
new profile. Upon successful test you will
tap the twice to get back to the main
screen.
Make sure the Data Format is set to RTCM
v3. Leaving Network Type and Reference
Antenna set to Automatic is
recommended. Tap Finish to complete the
process.
Connect to FLX100 plus Antenna

Leica Zeno Connect Setup Guide
At the home screen you will now see fields
populated and accuracy being reported. In
less than a minute you should see
horizontal accuracy down to .07ft/2cm level.
Connect to FLX100 plus Antenna
At his point you may begin streaming
positions to third-party applications
such as
• Esri Field Maps
• Esri Survey 123
• Geolantis360
• Pointman
• Geosync
• Field Genius
• Flowfinity
• Ecobot
• OnStation and so on.
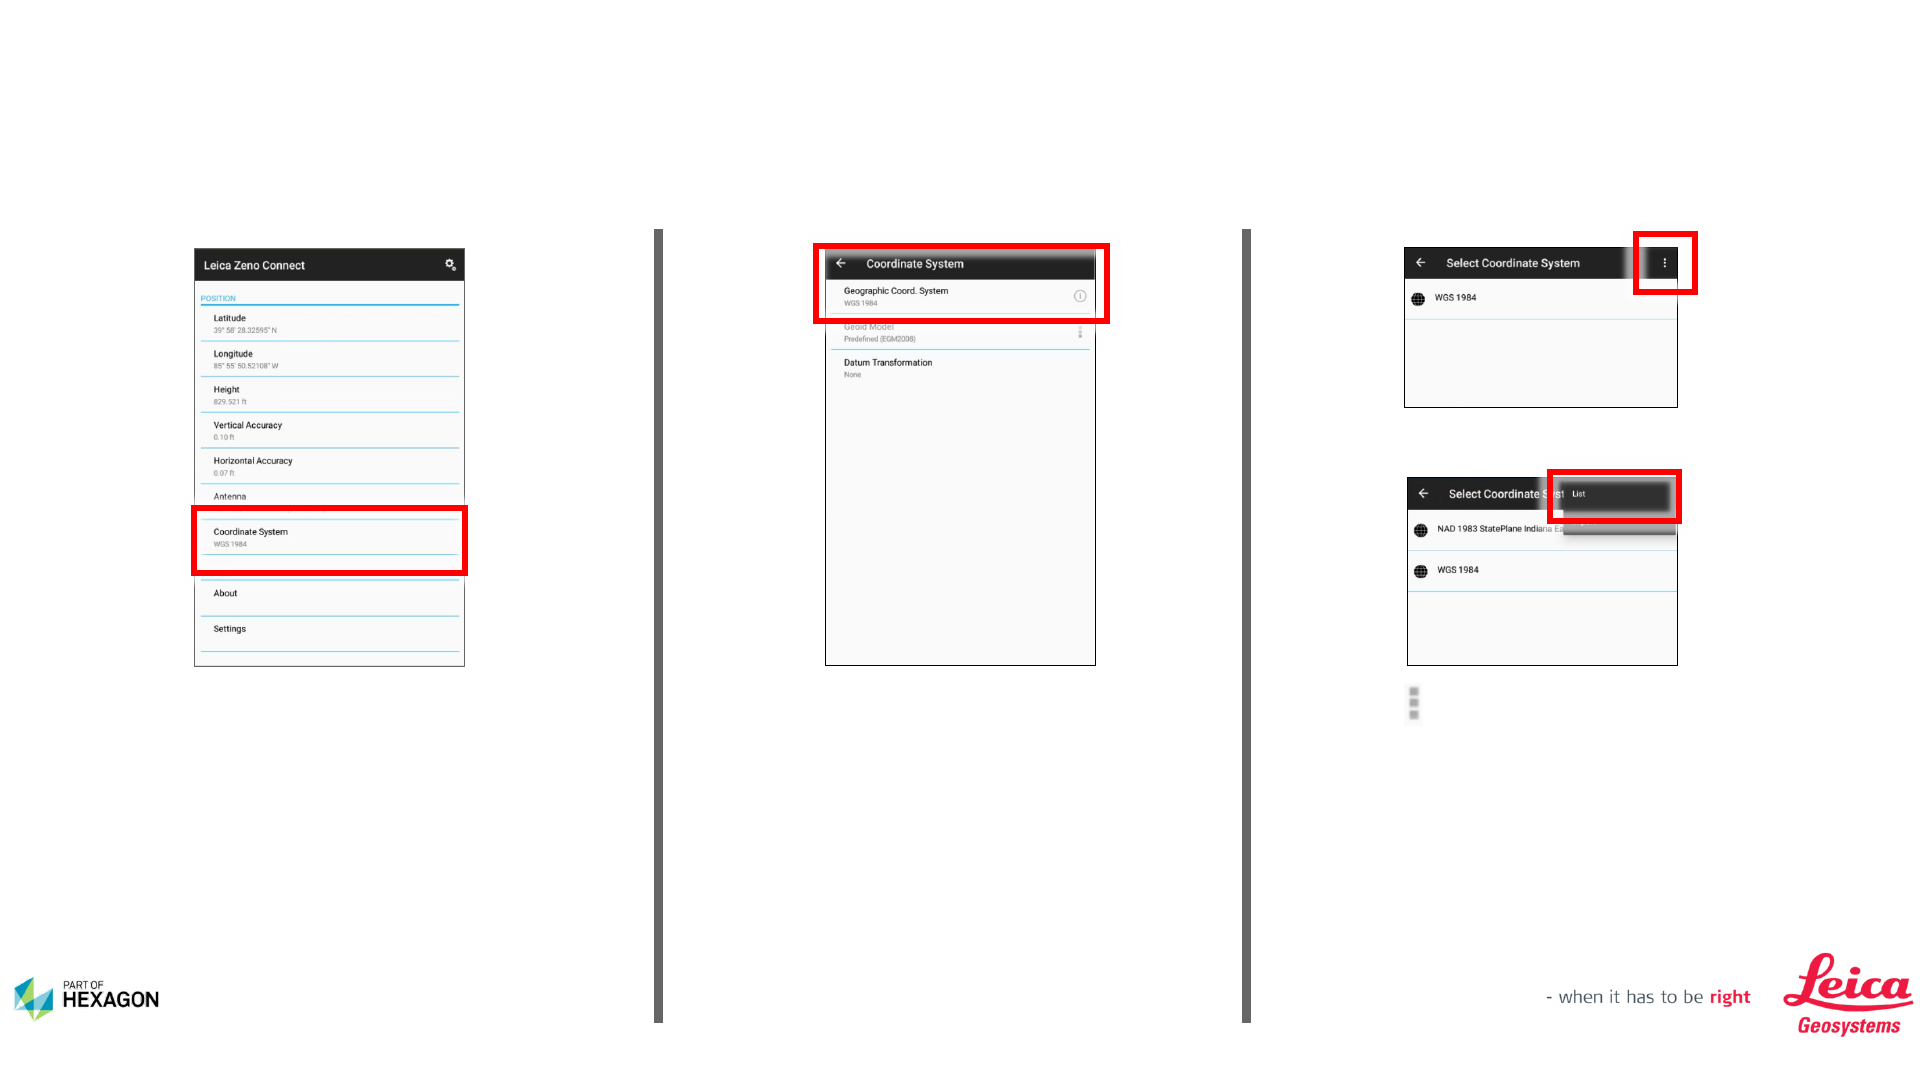
Leica Zeno Connect Setup Guide
At the home screen tap on the Coordinate
System field.
Tap on the then select List. To apply a geoid properly select the
coordinate system the GIS using. In this
case we will select a State Plane option.
Tap on Geographic Coordinate System.
Advanced Usage; Apply a Geoid for Orthometric Elevations

Leica Zeno Connect Setup Guide
Tap on the Projected folder. Select your coordinate system. Once
selected you will be taken back to the
Coordinate System screen.
Tap on the folder for your projected
coordinate system.
Advanced Usage; Apply a Geoid for Orthometric Elevations

Leica Zeno Connect Setup Guide
Tap on Geoid Model field. Scroll down to your country, in this case
USA, and tap on USA folder.
Tap on the to open Geoid Model Region
menu.
Advanced Usage; Apply a Geoid for Orthometric Elevations

Leica Zeno Connect Setup Guide
Tap on the region folder, for this example
Midwest.
Tap on the geoid file you need. Example
shown IN G18 GRS80.
Tap on the State folder. Example shown
Indiana.
Advanced Usage; Apply a Geoid for Orthometric Elevations

Leica Zeno Connect Setup Guide
Geoid will now be loaded and selected. Tap
the button twice to get back to the home
screen.
When setting the geoid file for use, keep in
mind Zeno Connect is still streaming lat/lon
to the third-party application. Only the
elevation is being affected by the settings.
Advanced Usage; Apply a Geoid for Orthometric Elevations
Leica Zeno Connect Setup Guide
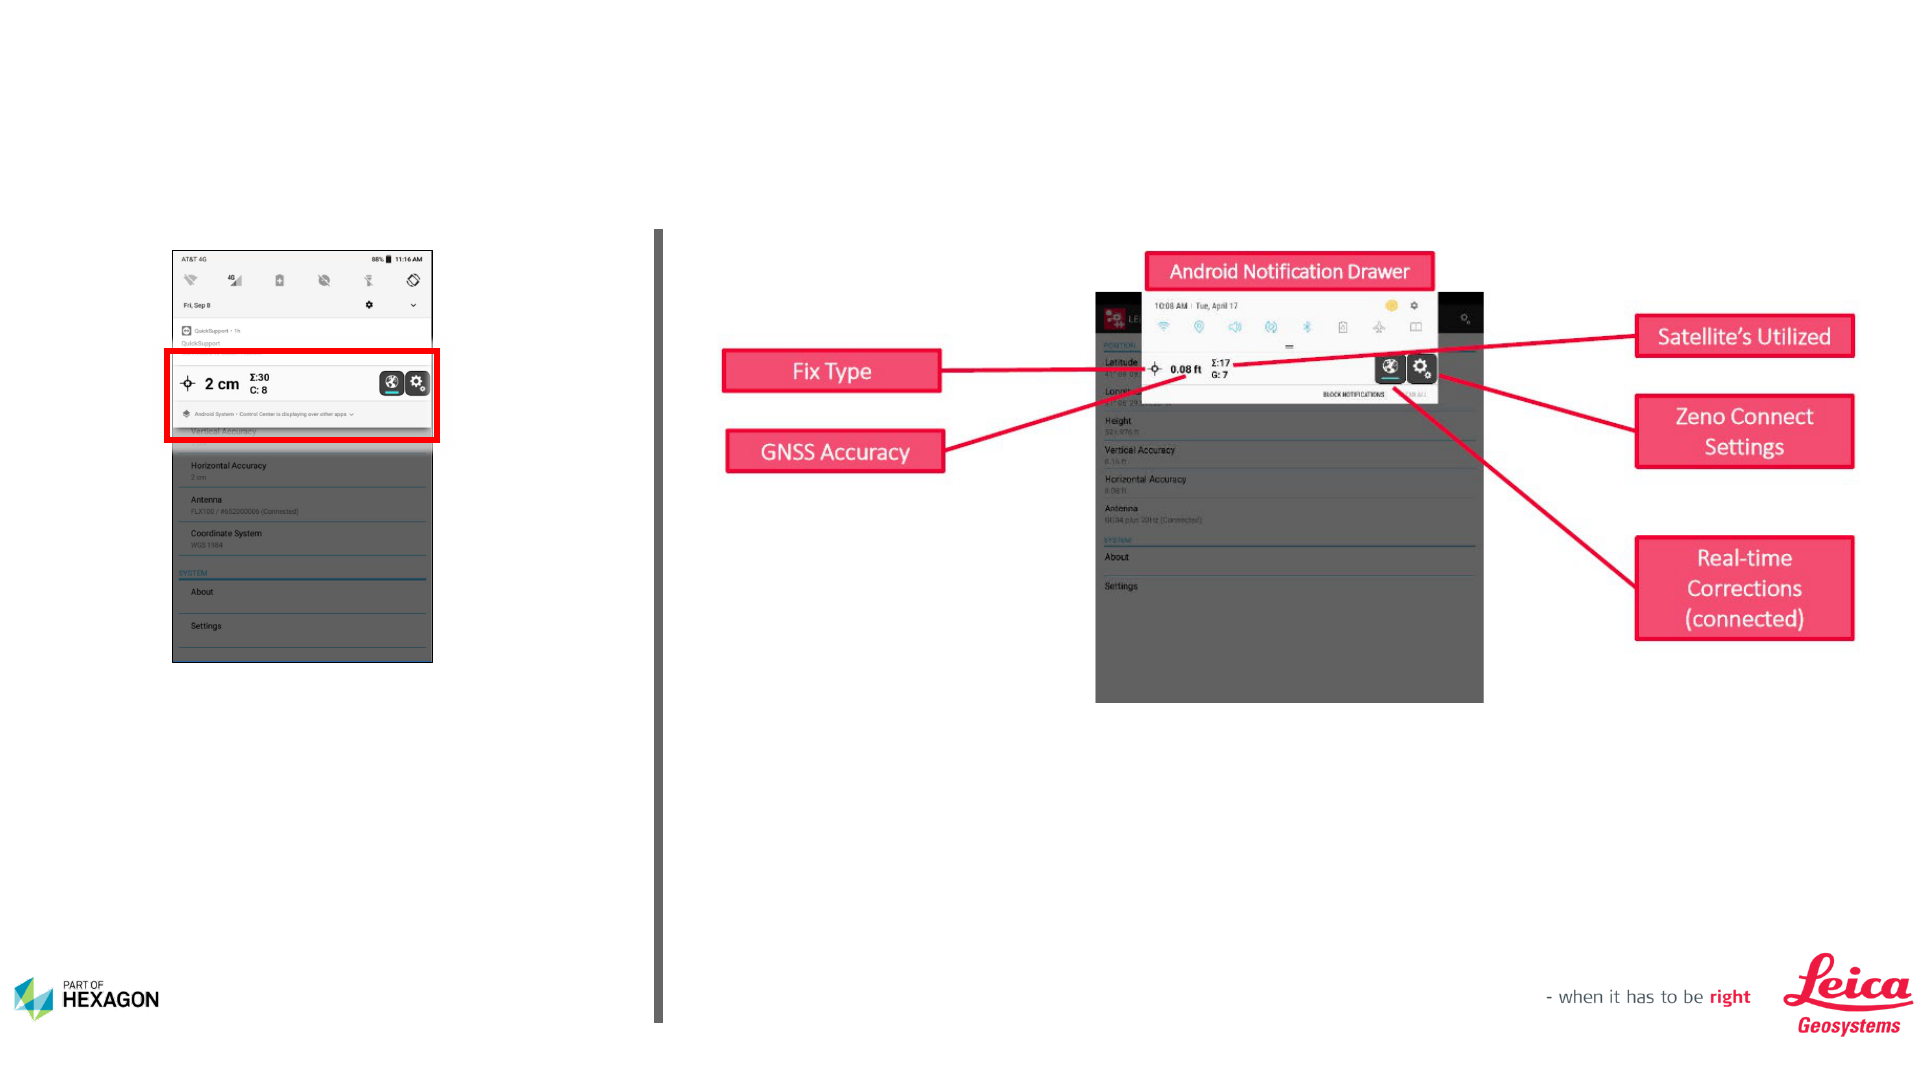
When you swipe from the top of an Android
device screen you will see the Zeno
Connect widget. This widget provides you
with a lot of info instantly.
Quick Access Widget; Always Available
